The main feature of this package is it allows mappers to put checkpoints (keys) in maps.
These keys, once taken allow players to advance to another part of the map.
It has originally been designed for BT but it could be used for any other type of game if relevant.
To be able to recognize maps created using this technique, we chose to tag them "CTF-BT+" instead of "CTF-BT-".
More infos can be found on the i4games website and forums.
Loading the package
*Update with new scripts 2006-07*The package you need to work with BT+ actors is i4Games_BTScripts_200607.u
Place it in your "UnrealTournament\System" directory.
You load it by bringing up the actor window and clicking (on this window) on "File ==> Open Package...".
If you look closely you will have a number of new actors available.
BT+ Keys
The keys can be found in the actor window as "Inventory ==> Key".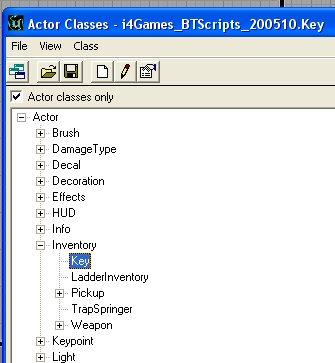
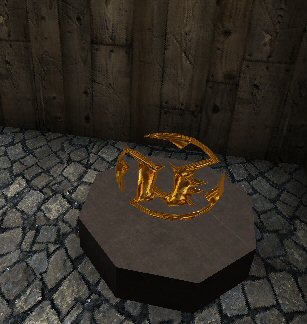
Place a key somewhere in the map using the 3D view by right clicking and selecting "Add Key".
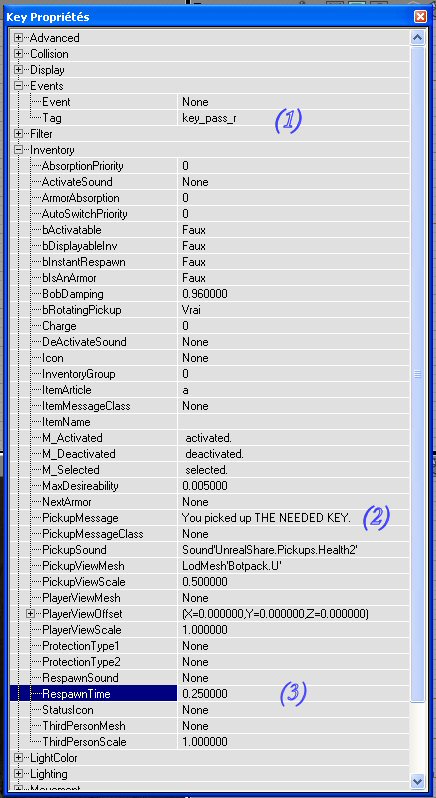
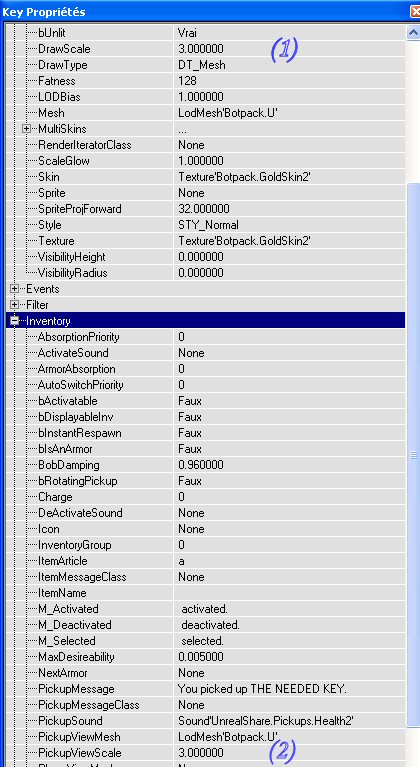
Set the following properties :
(1) Events ==> Tag : That will be used to reference the key.
(2) Inventory ==> PickupMessage : The string that will be displayed when a player picks up this key.
(3) Inventory ==> RespawnTime : Time elapsed (in seconds) before the key respawns after being taken.
The RespawnTime is set to 0.1 seconds by default with the new scripts whereas it was 0 sec in the previous version.
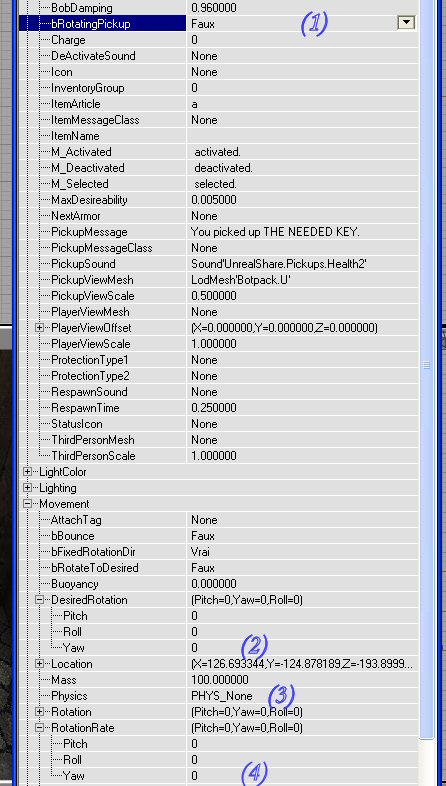
If you want to stop the key rotation, set the following properties :
(1) Inventory ==> bRotatingPickup : Set it to False.
(2) Movement ==> DesiredRotoation ==> Yaw : Set it to 0.
(3) Movement ==> Physics : Set it to PHYS_None.
(4) Movement ==> RotationRate ==> Yaw : Set it to 0.
If you want to change the key size, set the following properties :
(1) Display ==> DrawScale : Set it to a value (1.0 is the normal size, 2.0 is twice bigger, 0.5 is half the size and so on).
(2) Inventory ==> PickupViewScale : Set it to the same value.
Also, don't forget to change the position of the key accordingly as it gets bigger or smaller.
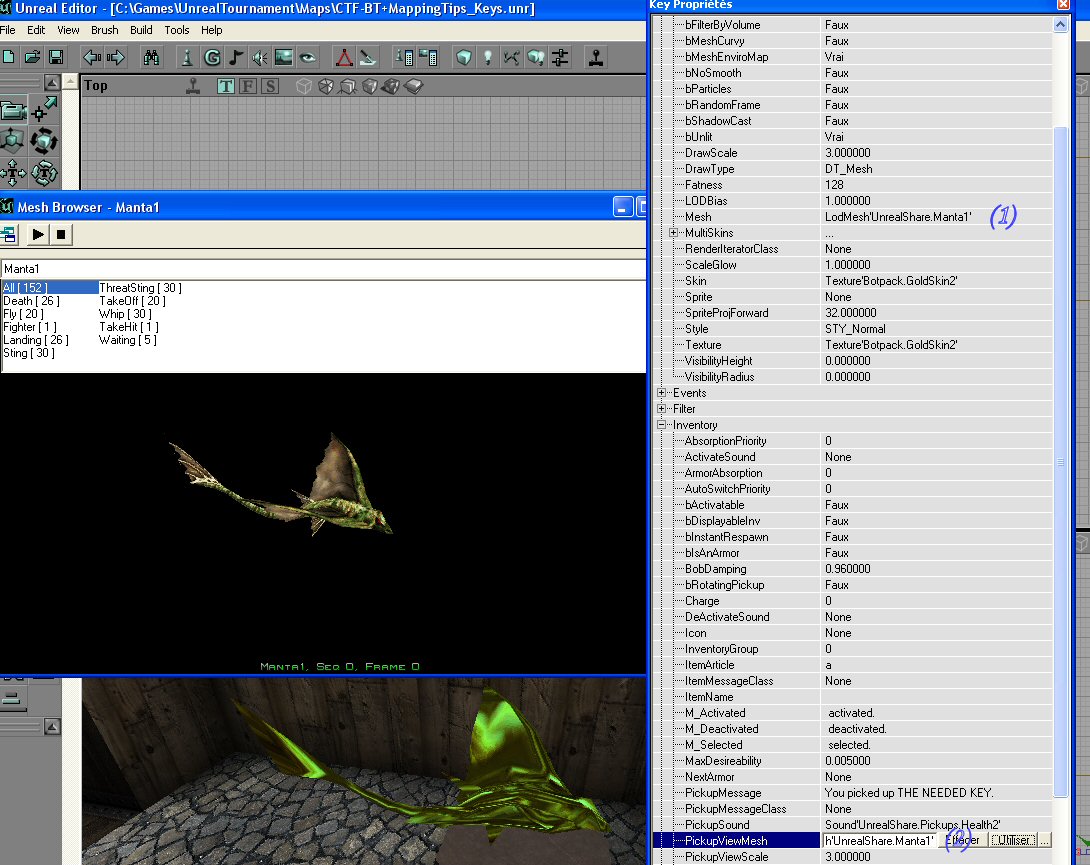
If you want to change the key aspect, set the following properties :
(1) Display ==> Mesh : Choose a mesh from the Mesh Browser.
(2) Inventory ==> PickupViewMesh : Choose the same Mesh as above.
Note about the Key HUD display (BTScripts200606) :
You must make sure the collision volume of the key encloses the key to make a proper resized HUD.
If the collision volume is too small, the keys you pick up will look very big on the HUD.
BT+ KeyKickers
The keykickers can be found in the actor window as "Triggers ==> Kicker ==> KeyKicker".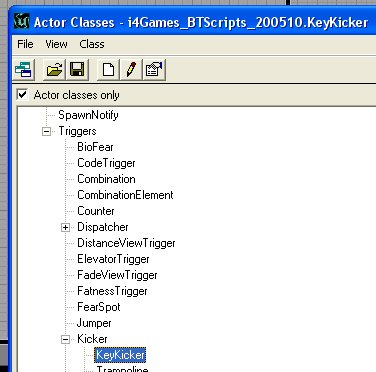
They are used in portals to block the path unless you have the proper Key.
Place a KeyKicker where you want the players to be blocked in the map using the 3D view by right clicking and selecting "Add KeyKicker".
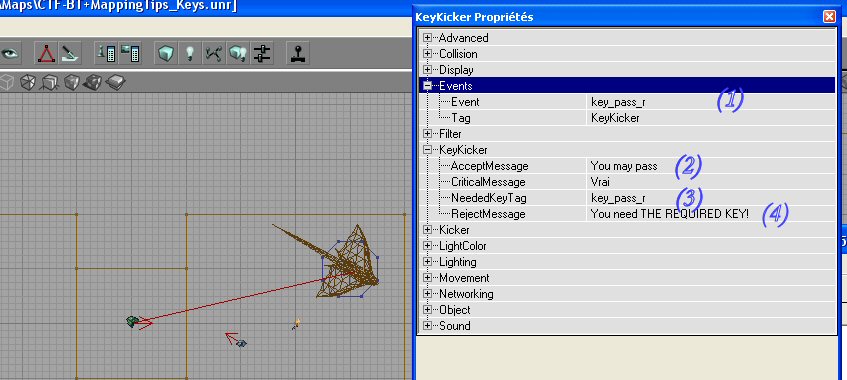
Set the following properties :
(1) Events ==> Event : The tag of the key needed. It is not mandatory to set this property but it's easier to see which key is linked.
(2) KeyKicker ==> AcceptMessage : This string will be displayed if the access is granted (when the player has the correct key). You can also leave it blank for no message.
(3) KeyKicker ==> NeededKeyTag : The tag of the key needed.
(4) KeyKicker ==> RejectMessage : This string will be displayed if the access is denied (when the player does not have the correct key).
You have an extra option with BTScripts200606.
KeyKicker ==> KickIfNoKey : By default, it's set to "True". That means the kicker will kick if you don't have the specified key. If you set it to "False", the KeyKicker will kick if you have the specified key.
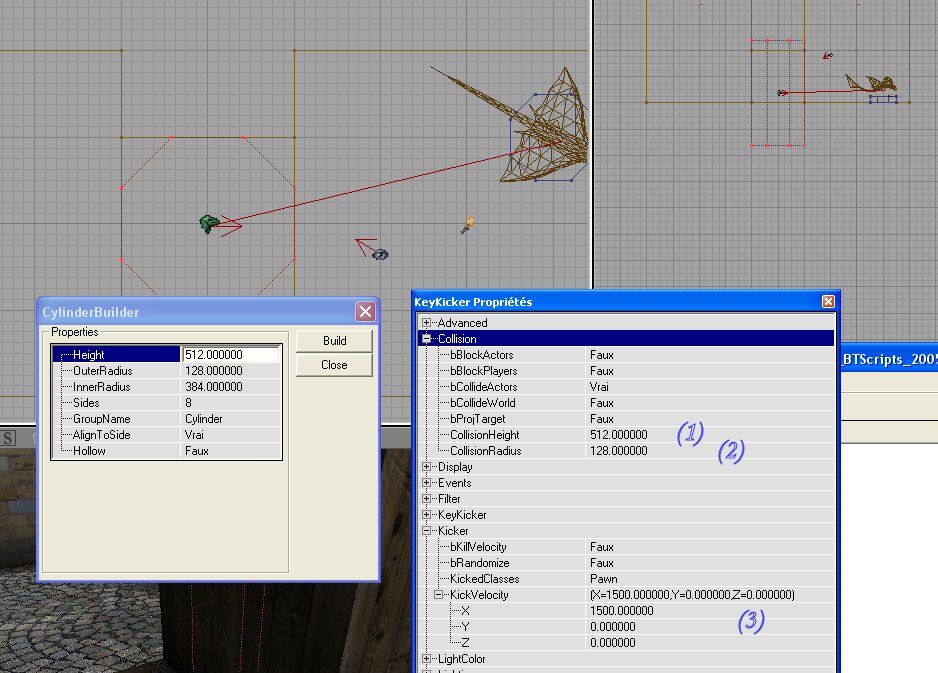
Now you have to set the force with which the player will be kicked back and the collision :
(1) Collision => CollisionHeight : The height of the collision.
(2) Collision => CollisionRadius : The radius of the collision.
The collision is a cylindrical volume around an actor.
It is necessary this volume is big enough to completely close the portal otherwise a player could just walk around the KeyKicker.
To visualize the collision volume, just right click in the top bar in the 3D view and select "Actors => Radii View".
Now if you click on any actor, you see its collision volume in the 3D view.
Change the values in fields (1) and (2) until you see the collision volume fills the path you want to block.
Don't hesitate to make it a bit bigger than the path.
(3) Kicker ==> KickVelocity ==> X,Y,Z.
The kick velocity must be big enough to push the player back. A minimum value of 1500 is recommended.
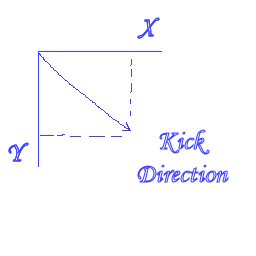
It is also very important to kick back the player in the right direction.
If we look at the top view, a positive value for X (and 0 for Y and Z) means the player will be kicked to the right and a negative value for X (and 0 for Y and Z) means the player will be kicked to the left.
If you put a positive value in Y (and 0 for X and Z), the player will be kicked down (from the top view) and a negative value for Y (and 0 for X and Z) means the player will be kicked up (from the top view).
No need to explain further for Z, it's equivalent.
You can also combine the values to obtain a kick in any direction. The direction is in fact defined by the vector (X,Y,Z).
For instance, from the top view, if you set the values (X,Y,Z) to (1500,1500,0), the player will be kicked diagonally to the right and down.
Other BT+ actors
There are more actors to use from the BT+ package like for instance the KeyZone, the CountTeleporter and so on.Check the i4games website and forums for more info.