They can move when activated or move constantly in a loop.
Building a mover
You can build a mover from one brush or multiple brushes.However, if the final shape is too complex, it might create visual and/or collision problems online or even offline.
The best way to create movers is to build a room dedicated to this task.
You create your brushes there by adding and substracting shapes, moving vertexes and so on, just like you would do to create a solid structure. Create this structure at a reasonable distance from the walls so it can be later enclosed by a cube to create the mover.
Do not forget to put textures on your surfaces, resize, align, rotate them until you have the result you wanted. Note : I have noticed textures can ignore your changes (resize, ...) later in the actual mover but there's a way to fix that. I will explain this further in this page.

When you have built the brushes, you must now create the mover.
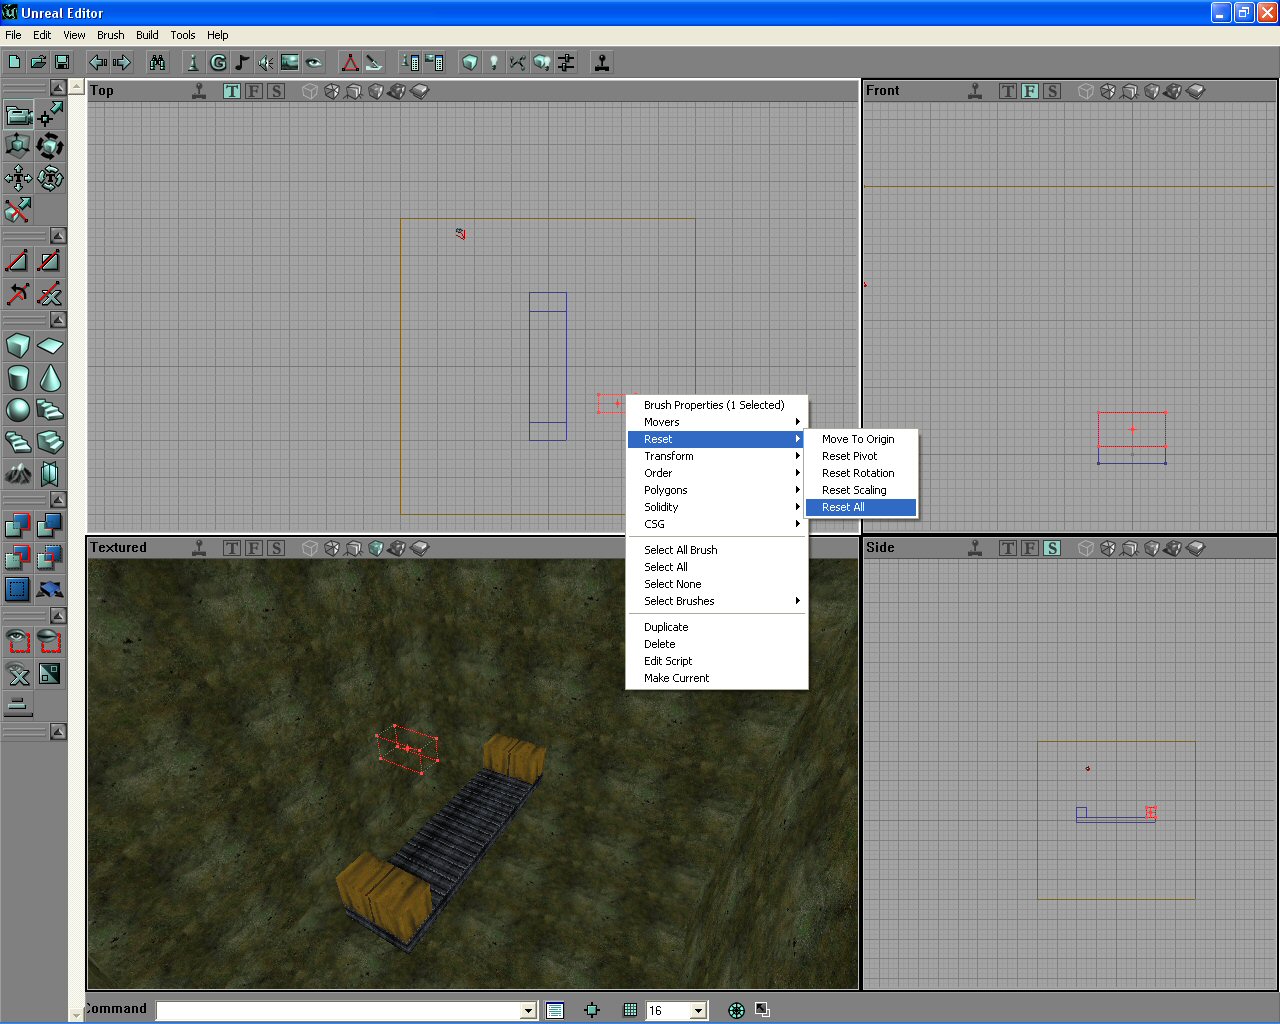
Before doing anything else, you MUST reset any rotation or scaling in the building brush by right clicking on it and selecting "reset => all". If you fail to do this, your mover will likely be non-solid but in the center.
Right click on the cube shape builder and set values to create a cube with the building brush large enough to enclose all the brushes being part of your mover. DO NOT use click and drag to resize the building brush !

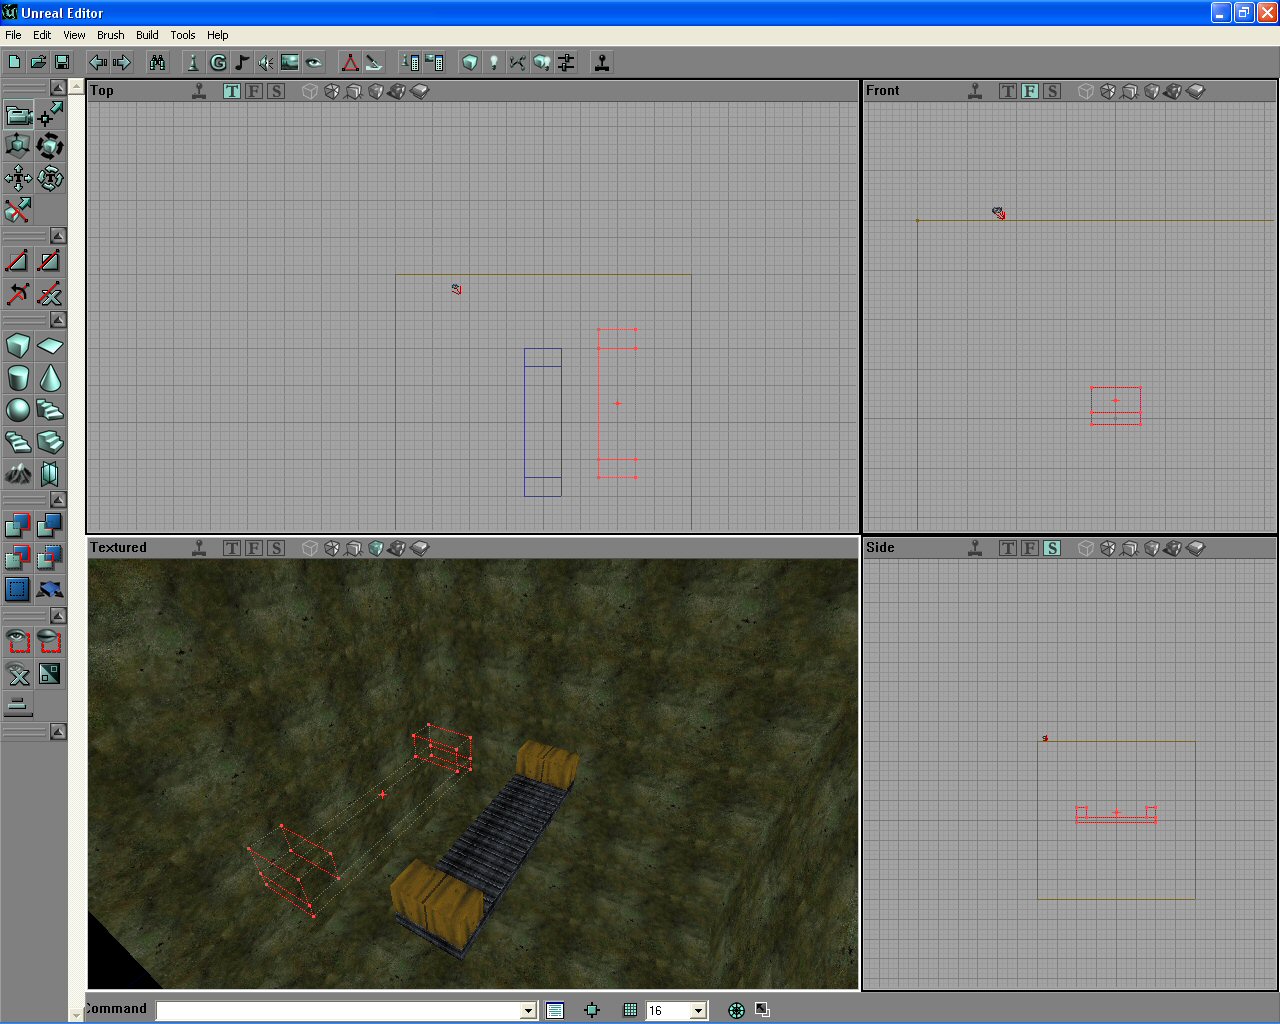
Position the building brush so that it encloses the mover brushes and click on "intersect".
Note : Before intersecting, make sure the pivot of the building brush is in the center of your structure. This is very important for rotating movers because they rotate around the pivot point.
Alternatively, if your mover is only composed of one brush, you can just right click on the brush and select "Polygons => To Brush".
The the building brush is ready to add the mover.
Move it where you want the the start position of your mover.
Adding a mover
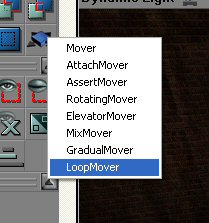
There are a few types of movers, you can access these types by right clicking on the "add mover" icon.By default, if you click on the icon, it adds a simple mover.
In most cases, you will only need two types of movers, the simple mover and the Loop Mover.
The Rotating Mover can be used but it bugs online. If you still want to use a rotating mover, just make sure to set the property "Networwing => RemoteRole" to ROLE_DumbProxy otherwise it won't rotate online.
You might also have to change the values of "Networwing => NetUpdateFrequency" but that's really a pain.
The best way to do a rotating mover that will work every time is to add a simple mover and to change the property "Movement => RotationRate => Yaw" to a value (negative values make the mover rotate counterclockwise).
You also have to change "Object => InitialState" to "None" otherwise, if you leave it to "BumpOpenTimed" (the default value), the mover will reset to its start position as soon as a player touches it.
You can also make semi-rotating movers like an elevator turning one way when going up and the other way when going down.
This is done by adding a simple mover and rotating it manually on its "key 1" (explained later) pressing Control, right-click and dragging in camera mode.
The Attach Mover is handy when you want to attach actors to your mover. For instance Death Triggers, teleporters and so on can be attached to your mover so they move with it. Note : It's better not to attach flags to movers because that creates messages "The flag has returned" everytime the move is activated.
However, most actors can be attached to a simple mover. To do so, set a mover tag ("Events => Tag") to a value and set the same value in "Movement => AttachTag" for every actor you want to attach to this mover. The value you set must be unique for a mover otherwise the actors won't know which mover to follow.
The Loop Mover is usually used to make movers moving forever. To make them move forever, they must be used together with a Timed Trigger.
For the mover, you set the "Events => Tag" to a value and the "Object => InitialState" to "LoopMove".
Then you add a TimedTrigger actor anywhere in the map and you set "Events => Event" to the same value and "TimedTrigger => bRepeating" to True. One TimedTrigger can be used to make many movers move.
The AssertMover is used to make different move times between the keys. For instance, you can use this type of mover to make an elevator go up slowly and get down fast, saving time for the other players waiting.
Setting the mover keys
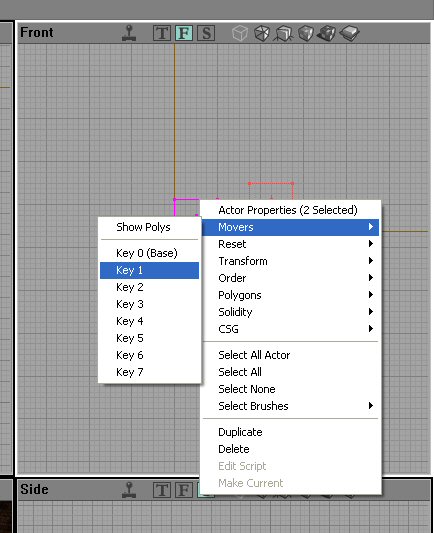
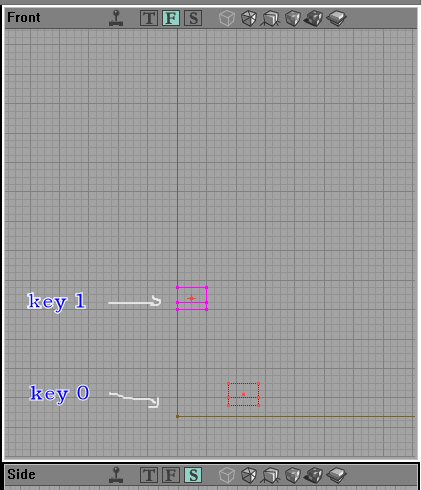
When you have added your mover, you must set the positions (called keys) the mover will take.To do so, select the mover, right-click on it and select "Movers => Key 1". Move your mover to the second position you want it to be.
Then select "Movers => Key 0" again reset the mover to its start position.
To verify whether the positions are correct, switch from key 0 to key 1 and back to key 0 again.
You can make up to 8 positions but since, by default, a mover is set to 2 positions, don't forget to change the value of "Mover => NumKeys" to the number of keys you set.
Main mover properties
- "Mover => DelayTime" : The time in seconds before the mover starts to key 1.
- "Mover => MoveTime" : The time in seconds between two keys.
- "Mover => StayOpenTime" : The time in seconds between two keys.
- "Mover => MoverEncroachType" : What happens when a player is "stuck" by the mover. It is advised to put this value to "ME_CrushWhenEncroach" (the player is crushed) unless you designed the map to do otherwise. If a player is stuck under a fast mover and that its property is "ME_ReturnWhenEncroach", other movers will be bugged (especially Loop Movers activated by Timed Triggers), they either will stop, won't start when activated, desynchronize and so on.
- "Object => InitialState" : This value sets the way the mover is activated.
The 4 main values to use are :
- "BumpOpenTimed" meaning the mover is activated when the player touches the mover.
- "TriggerOpenTimed" meaning the mover is activated by a trigger.
- "LoopMove" must be used for a Loop Mover.
- "None" when you make a mover rotate without using a rotating mover.
- Setting "Mover => bDynamicLightMover" to True can be used if your mover is completely black or when the mover gets invisible after a while (no garantee it works though).
Triggered activation of movers
If you want to activate a mover when a player shoots somewhere, passes somewhere or presses a button, here is how to proceed.- Button activation :
A button is a mover in itself. When the mover and the button are built and postioned, just make sure
to set the following values. For the button, set the "Events => Event" parameter to a value and set
the "Object => InitialState" to "BumpOpenTimed". For the mover activated by the button, set the
"Events => Tag" parameter to the same value as button's "Events => Event" parameter and set
the "Object => InitialState" to "TriggerOpenTimed".
It's better when a button stays in its "pushed" position during the time the mover activated by this button maske its position cylce.
Calculate the mover total time using this formula :
[mover delay time] + [mover move time] x 2 x ([mover number of keys] - 1) + [mover stay open time]
Now the button (2 keys) times must be set so that [button move time] x 2 + [button stay open time] equals the value calculated above for the mover.
This looks hard but in fact it's not. A move time is always counted twice per key because the mover goes one way and then comes back.
- Trigger activation : Place the trigger where you want it to be and set the "Events => Event" parameter to a value. Also set the "Trigger => TriggerType" to "TT_PlayerProximity" if you want the trigger to send its event (activate the mover) when a player is near it. Or set the "Trigger => TriggerType" to "TT_Shoot" when a player has to shoot on it. For the mover activated by the trigger, set the "Events => Tag" parameter to the same value as button's "Events => Event" parameter and set the "Object => InitialState" to "TriggerOpenTimed". Note : You can change the radius and the height of the collision zone (the zone volume monitored by the trigger) to adjust exactly when the trigger detects a movement or a shot. For instance, if you set "Collision => CollisionRadius" to a value of 200 (instead of 40 by default) on a trigger of type "TT_Shoot", the player will be able to shoot a very large zone around the trigger to activate it.
Checking the mover textures
You can see the mover textures, align, rotate, resize them and so on by right clicking on the mover and selecting "Movers => Show Polys". Don't forget to rebuild after you change something.Last step
ALL movers must be set on key 0 before testing/releasing a map, especially loop movers which won't move otherwise.Example map
Download the example map CTF-BT-MappingTips_Movers.zip.Extra tips
- Do not put too many movers in a map or in the same room. Especially Loop Movers that take some server resource and may make your map bumpy.
- Do not position complicated movers too close to one another. That may be a cause of movers becoming invisible.